
Titan Quest II maintains the core pillars of its acclaimed predecessor while introducing refreshed systems for modern players.
Our walkthrough offers strategic insights tailored to both series veterans and newcomers exploring this revamped mythological realm.
Customizing Controls
Standard configurations utilize left-click navigation and right-click combat, but nostalgic gameplay preferences can be restored through menu adjustments. Navigate to Control Settings and enable the “Unified Action Binding” option under Input Preferences to merge movement and combat functions on your primary mouse button.
Allocate the left mouse input to Ability Slot 10 post-activation for classic control replication. This streamlined setup combines exploration and combat mechanics through single-button functionality.
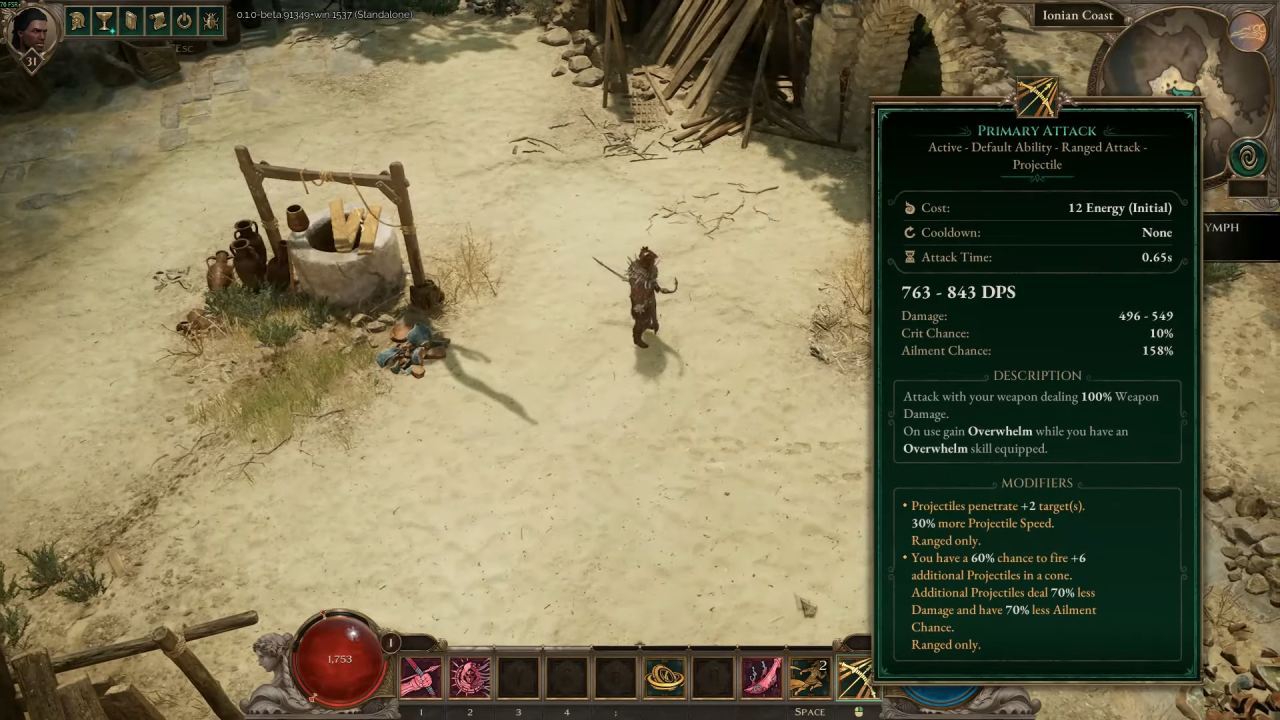
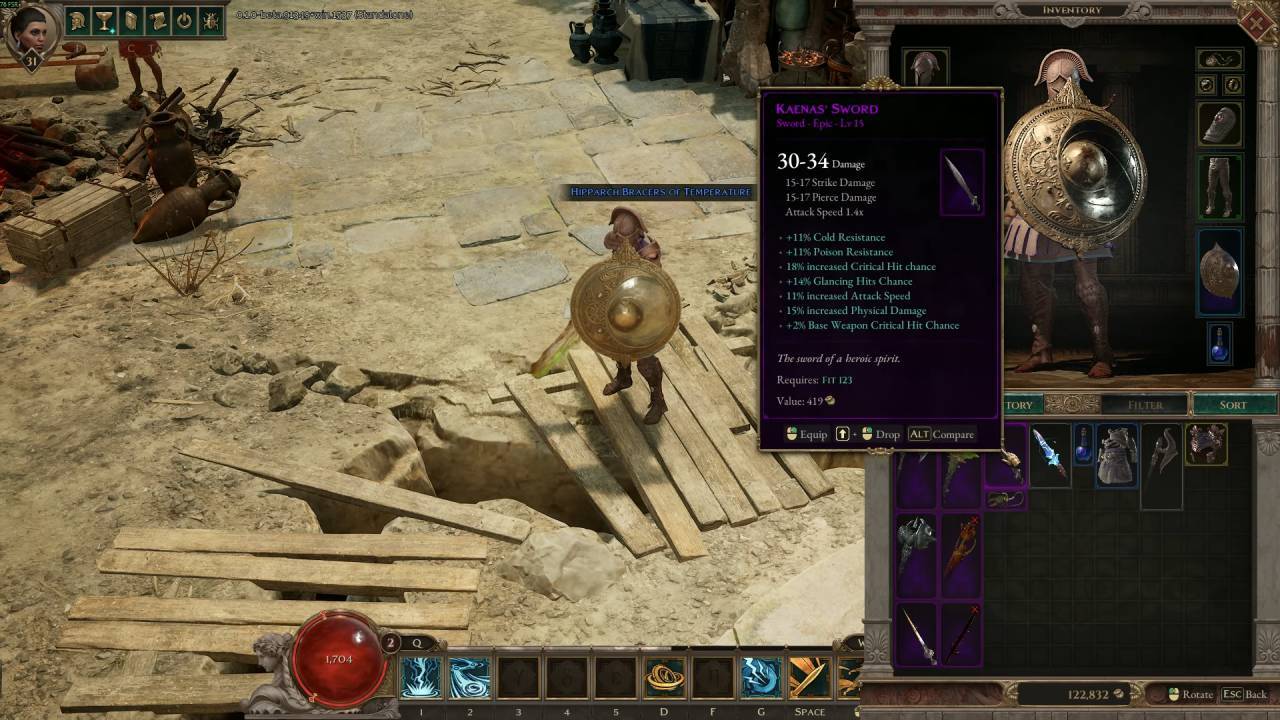
Loot Identification Framework
The sequel introduces inverted color indicators for equipment tiers compared to earlier installments. While rarity classifications remain unchanged, their visual representations now employ contrasting hues – azure denotes enchanted gear while violet signifies epic artifacts.
Traditionalists can restore legacy coloration through Display Options. Activate “Retro Rarity Palette” to align loot distinctions with the franchise’s original chromatic hierarchy.
Consumable Dynamics
Characters now wield dual restorative flasks with unique replenishment mechanics. Health phials regenerate through aggressive play, while mana draughts recharge based on energy recovery stats.
Initial capacities permit two health salvos and single mana expenditure before requiring renewal via combat engagement. Prioritize gear and talents amplifying energy regeneration rates to optimize potion accessibility during extended encounters.
Environmental Traversal
Vertical landscapes demand strategic navigation using contextual interactions. Golden-hued environmental indicators reveal scalable surfaces and mechanical devices – activate with primary input when prompted.
Certain ascension points facilitate unidirectional progression only. Observe cliffside markings and architectural features to identify potential climbing routes and irreversible pathways.
Divine Forge Mechanics
The Benevolent Altar encountered post-prologue offers attribute-aligned armaments. Consult your stat distribution prior to selecting bonuses corresponding to Strength, Dexterity, or Intelligence dominance to secure optimal weapon rewards matching your build strategy.
Exploration Incentives
Numerous obscured chambers containing premium loot await discovery through meticulous investigation. Search for destructible barriers, concealed switches, and narrow crawlspaces masked by natural formations to uncover these secret caches.
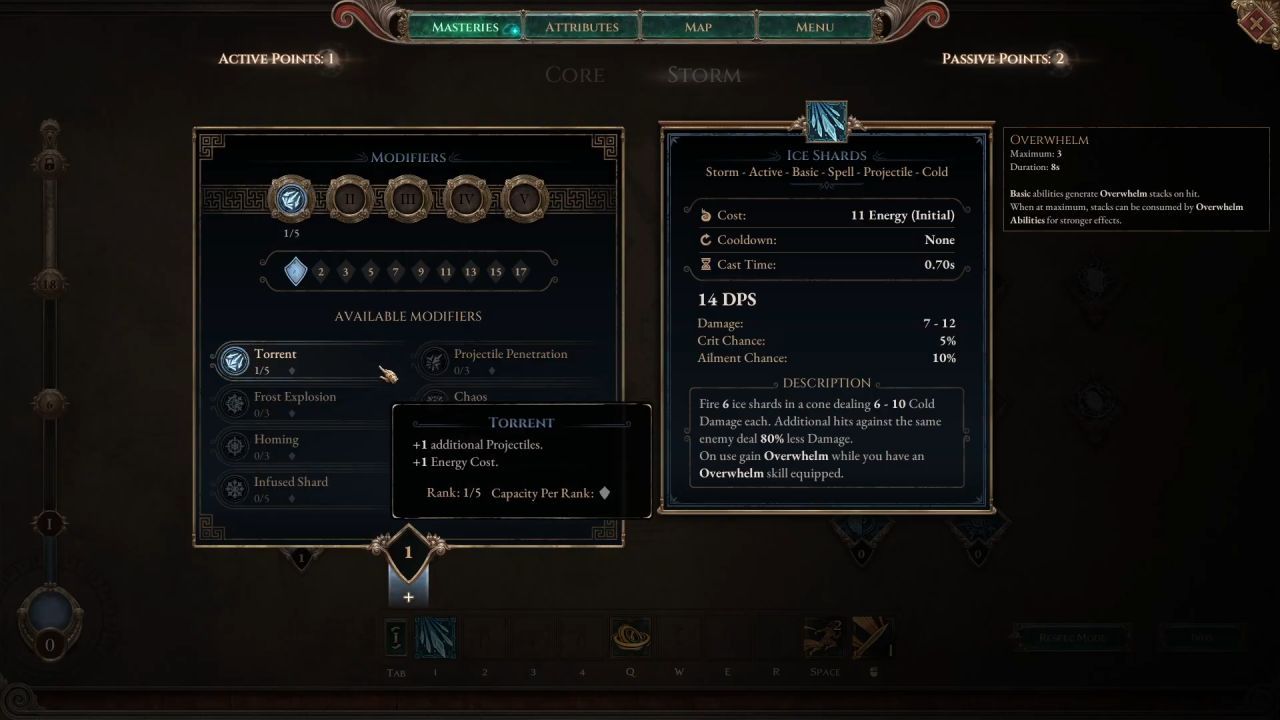
Class Specialization Progression
Mastery acquisition now integrates narrative milestones rather than level gates. Initial specialization unlocks occur during prologue sequences, while subsequent advancements require story-critical achievements.
Divinity Points awarded through level progression and narrative completion enable skill tree advancement. This hybrid development system synchronizes character growth with plot evolution.
Posthumous Recovery
Upon expiration, characters respawn at activated sanctuaries marked by luminous beacons. Deceased locations remain accessible via map markers or interface teleportation options for efficient corpse retrieval.
Objective Tracking
The integrated cartographic system consolidates mission management. Main story arcs and optional ventures appear categorized as Destiny Quests and Freeform Challenges respectively. Filter completed objectives using the progression slider to review historical accomplishments.
Adaptive Challenge Scaling
Sanctified Altars permit dynamic difficulty modulation and character recalibration. Apply dual challenge enhancers – either elevating adversaries beyond innate levels or scaling regions to match personal progression tiers for optimized farming.
Heightened peril settings yield superior rewards while enabling regional enemy respawns without requiring session resets. Strategic difficulty adjustment proves crucial for loot optimization and build experimentation.