

New laptops often arrive loaded with pre-installed software and distracting notifications. Vendors frequently partner with third-party developers to include these programs, but many users find them unnecessary. Optimizing your device early ensures smoother operation by freeing up resources like RAM and CPU capacity. Let’s explore key setup steps.
Optimize Privacy and Performance
While de-bloating tools handle most adjustments, manual tweaks further enhance functionality. Access Settings ➔ Privacy & Security to disable location tracking and restrict background app activity. Adjust display scaling and brightness under System ➔ Display for optimal comfort.
Backup and Recovery Settings
Performance-focused users often disable system restore points and hibernation via the command prompt using powercfg /h off. To manage storage efficiently, activate Storage Sense under System ➔ Storage for automatic cleanup of temporary files. Evaluate OneDrive usage based on subscription needs.
Software Installation Guide

While basic productivity apps may be included, use Winget in PowerShell for reliable installations. To add Chrome, execute:
winget install –id Google.Chrome –accept-package-agreements –accept-source-agreements
For Brave browser, use:
winget install –id Brave.Brave –accept-package-agreements –accept-source-agreements
System Cleanup Process
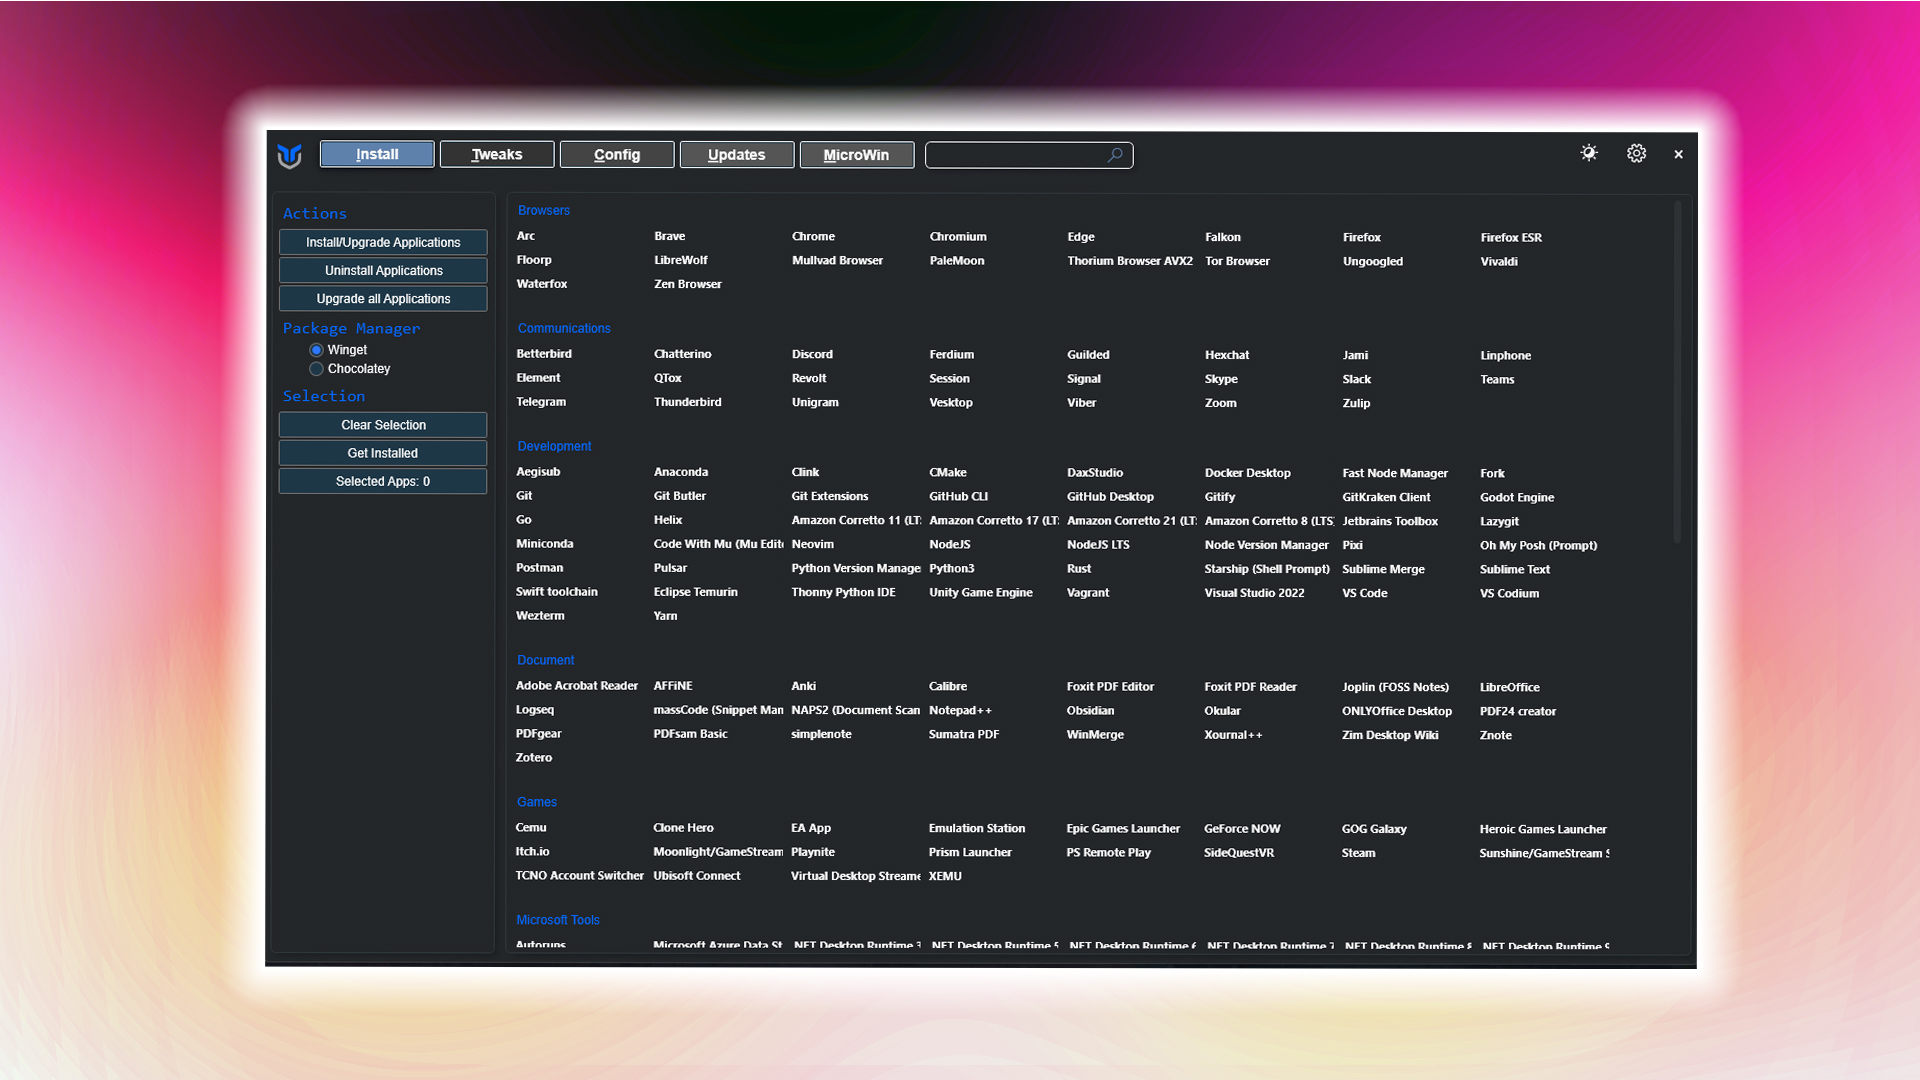
Third-party utilities help eliminate unwanted apps and reduce system telemetry. Execute this PowerShell command as administrator to deploy a popular de-bloating tool:
iwr -useb https://christitus.com/win | iex
Follow the tool’s interface to remove unnecessary components and services systematically.
Driver and OS Updates
Begin by checking Windows Update in Settings for critical patches. Visit your device manufacturer’s support page to obtain latest drivers for networking, audio, and hardware components. GPU updates should be sourced directly from NVIDIA, AMD, or Intel.
Account Configuration
Authenticate using a Microsoft account to enable cross-device synchronization during initial setup. For faster access, configure Windows Hello features like PIN, fingerprint, or facial recognition if supported. Link your account to activate Windows and secure BitLocker encryption keys.
Windows 11 Initial Setup Walkthrough
Upon startup, select regional preferences and connect to preferred networks. Enable automatic Wi-Fi connectivity for convenience. Review and accept Microsoft’s terms – these steps apply primarily during first-time configuration.