
To advance your gaming expertise, consider training on dedicated servers where interruptions are minimized. Customizable settings allow adjusting ability timers for focused practice. Below you’ll find essential management codes and steps to establish your own server environment.
Establishing Dedicated Play Spaces
To begin using administrative tools, first configure your personal server. Navigate through your preferred device’s browser to the game’s main page. Below community connections, locate the “Private Server Creation” option. After naming your instance, select Join to access it. These private environments require no ongoing costs for basic access.
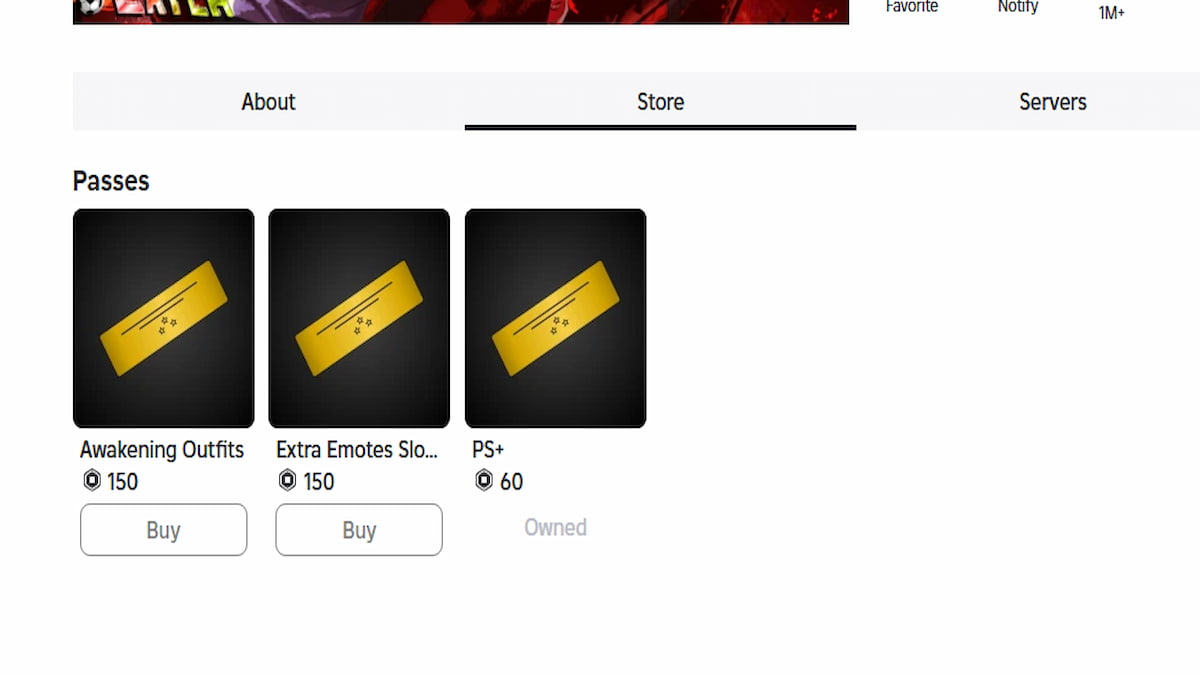
Enhanced control requires obtaining the Server+ Access pass available for 60 Robux through the game’s marketplace.
Server Management Codes
Essential control sequences for server administration appear below in reversed order:
- /version
- Function: Shows active game build version
- Usage: /version
- /serverban
- Function: Restricts server access for all users
- Usage: /serverban
- /kick (name)
- Function: Removes specified participant
- Usage: /kick username
- /disableflow
- Function: Deactivates special abilities globally
- Usage: /disableflow
- /disablekick
- Function: Blocks kicking mechanics
- Usage: /disablekick
- /stopRoundtime
- Function: Pauses match progression
- Usage: /stopRoundtime
- /ball
- Function: Generates play object
- Usage: /ball
- /f
- Function: Resets ability resource
- Usage: /f
- /ncd
- Function: Eliminates skill delays
- Usage: /ncd
Implementing Server Directives
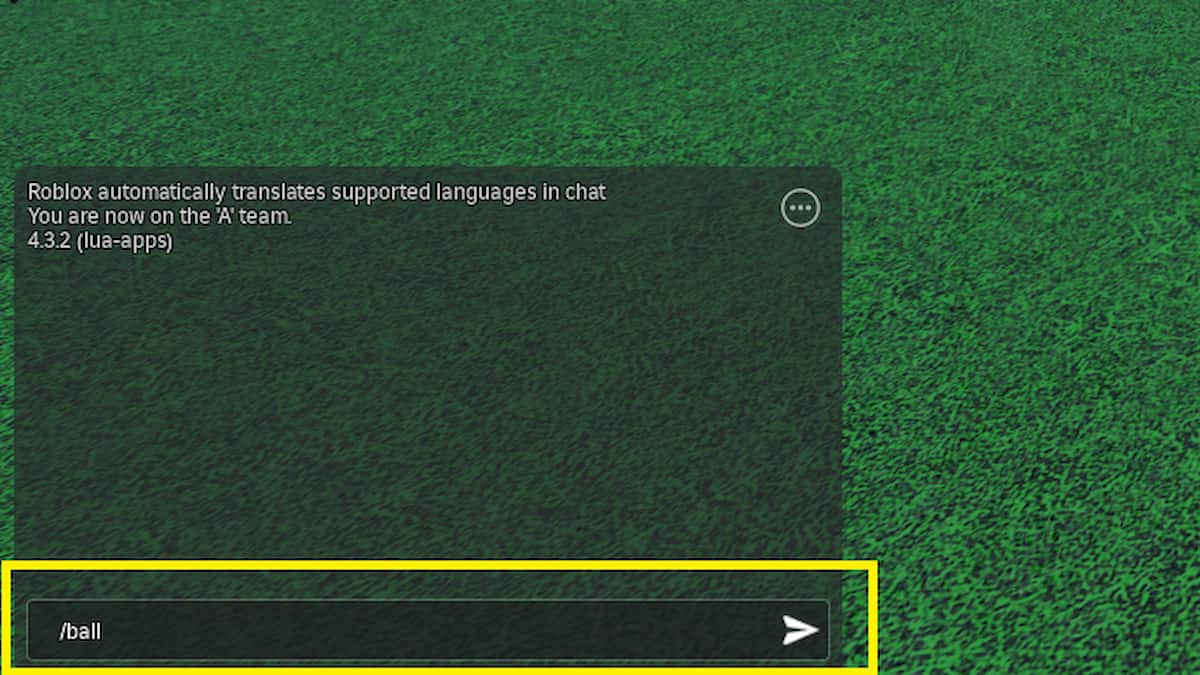
Execute administrative sequences through the communication panel, typically positioned at screen edges. Enter codes precisely and confirm using the transmission button to activate their effects.