

The learning process in Megabonk might feel intense for newcomers, with steep progression demands and limited initial resources. This overview provides foundational strategies to navigate early obstacles effectively.
Players should note that expanded equipment capacity becomes accessible after achieving specific progression markers. Additional gear slots amplify the impact of global modifiers, creating compounding benefits during extended sessions. When multiple armaments simultaneously benefit from attributes like critical multipliers or attack frequency, a fully equipped loadout eventually surpasses minimal setups in effectiveness.
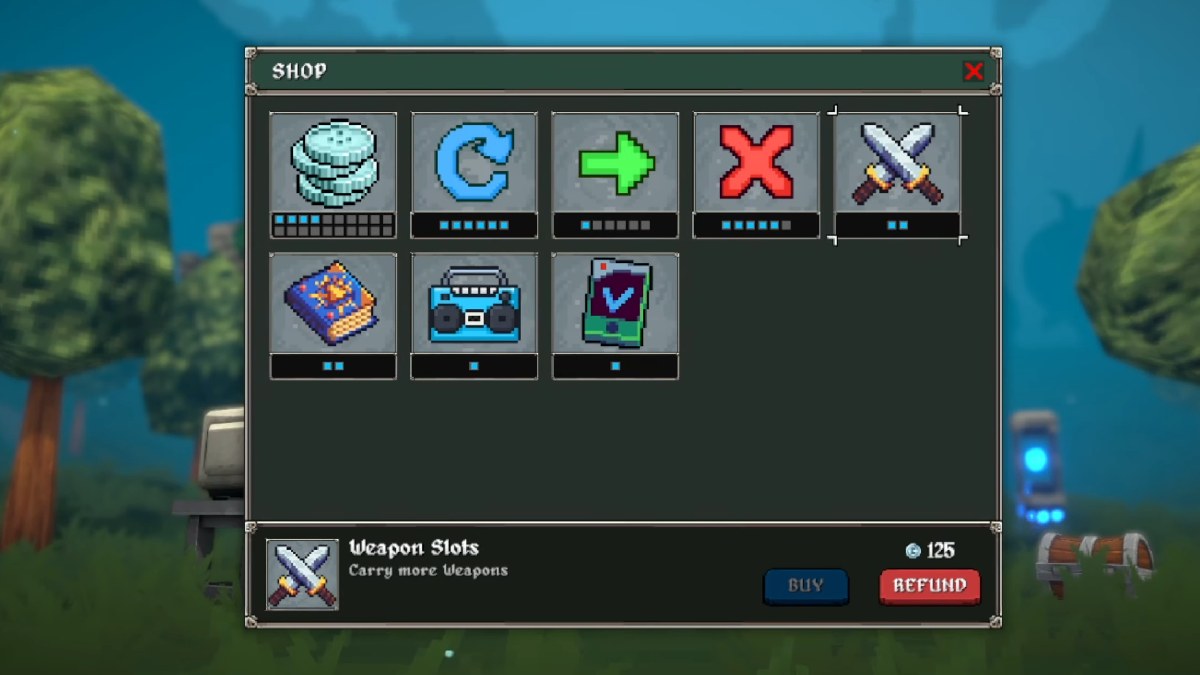
Expanded capacity shows diminished returns during brief engagements but becomes transformative in prolonged encounters. Advanced stages allow sufficient time to maximize synergies between multiple enhanced armaments and legendary modifiers.
| Slot Unlock | Requirement |
|---|---|
| Extra Tome Slots | Complete 60 quests |
| Second Extra Weapon Slot | Complete 35 quests |
| First Extra Weapon Slot | Complete 25 quests |
Silver Acquisition Strategies
This primary progression currency accumulates slowly, with most earnings coming from completed sessions. Prioritizing deeper stage progression yields better returns, as advanced tiers offer substantially higher rewards. Focus on objective completion to access tools that facilitate successful marathon runs.
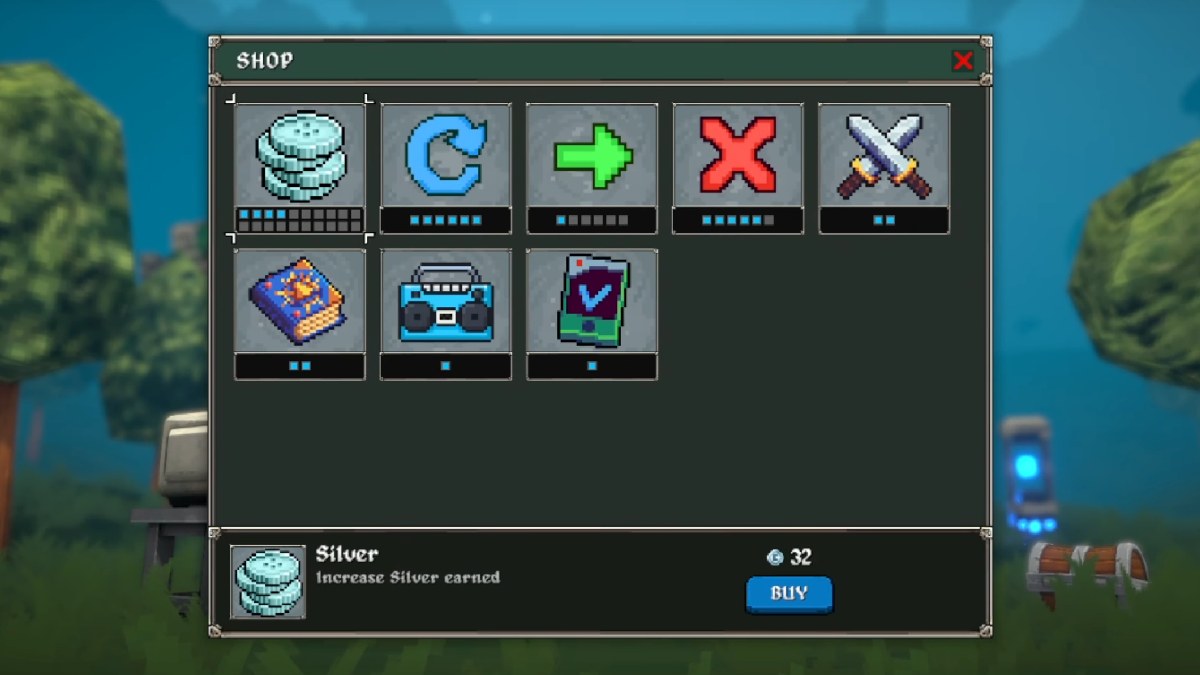
Resource allocation should prioritize functional unlocks over marginal silver bonuses. Securing the customization tool early creates better long-term results than temporary gains.
Customization System Essentials
This crucial unlock filters undesirable options from progression pools, ensuring build consistency. Unlock requirements involve substantial initial investments but provide unparalleled control over loadout development.
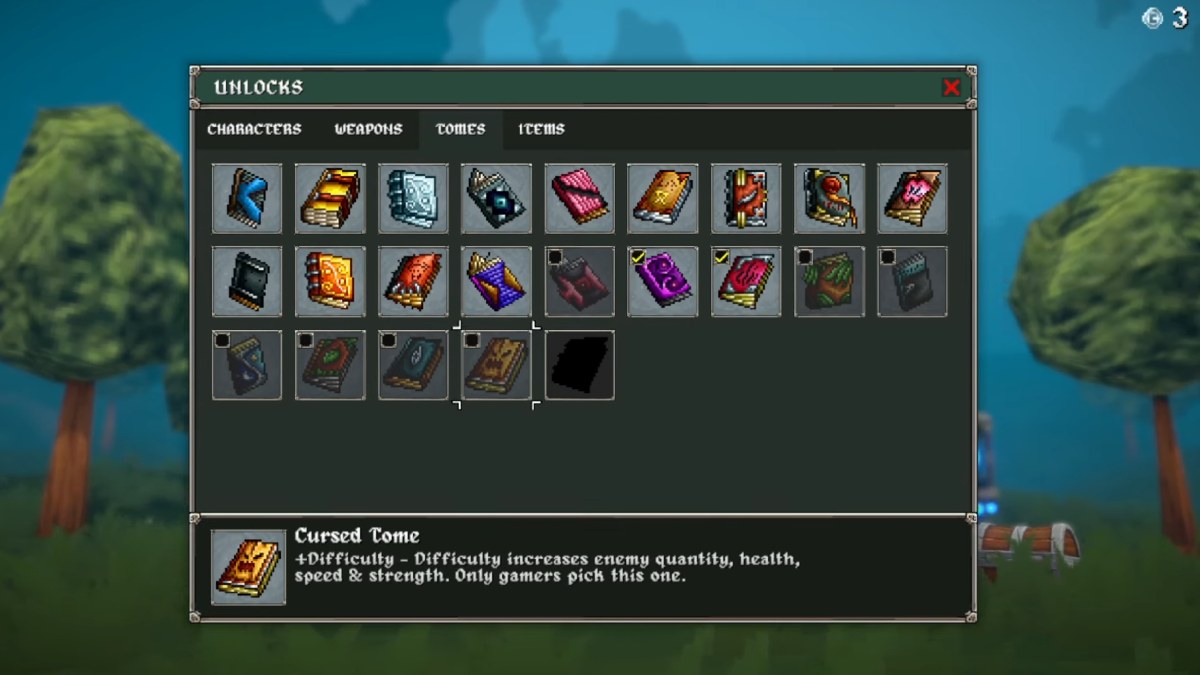
Post-unlock, players can curate available options to eliminate suboptimal choices and concentrate on powerful synergies. Strategic disabling of certain modifiers significantly reduces randomness and improves run consistency.
Stationary Survival Tactics
This restrictive trial necessitates reliance on passive mechanics and durability. Optimal character choices emphasize defensive capabilities, while loadout construction focuses on area control and automatic retaliation systems.

Early acquisition of experience attraction upgrades becomes critical for progression without mobility. Positioning tactics and environmental manipulation help mitigate incoming threats during later stages.
Nonviolent Progression Methods
Completing this challenge requires focusing entirely on reactive damage mechanics. Character selection favors defensive specialists, while upgrades prioritize retaliation capabilities and sustain. Early resource prioritization and strategic shrine usage prove vital for success.
Environmental Interactions Catalog
| Interactable | Description |
|---|---|
| Bandit Statue | Fighting and defeating the boss unlocks Bandit if you own the Dexecutioner weapon. |
| Suspicious Bush | Spawns a hidden boss and beating it unlocks the Sniper if you’ve bought their weapon. |
| Gold Key & Cage | Use the key to free the Monkey character. Keys drop randomly or from minibosses. |
| Boomboxes | Activate all on a map to unlock the Boombox shop item to select music (one-time unlock). |
| Teleporter | Ends a stage and spawns the boss. Tier 1 has no teleports, Tier 2 has one, and Tier 3 has two. |
| Shady Guy | Sells 2–3 items and you can revisit until you buy one. Hat color shows item rarity. |
| Gold Chest | Gives a free item with no drawbacks. |
| Microwave | Duplicates a selected item using another of the same rarity. Usable thrice. |
| Moai Shrine | Offers a choice of one of 2–3 free items. |
| Greed Shrine | Grants silver but increases difficulty by 5%, spawning more and stronger enemies. |
| Golden Charge Shrine | A rarer version that offers three legendary stat upgrades when charged. |
| Charge Shrine | Once filled, it lets you choose one of three random stat upgrades. |
| Boss Curse (Bloody Shrine) | Adds one extra of each boss when activated (only six health bars display at once). |
| Shrine of Succ | Instantly collects all unclaimed XP orbs on the map. |
| Challenge Shrine | Spawns strong enemies that can drop valuable loot. |
| Pots | Drop silver and/or XP; a steady income source throughout the run. |