
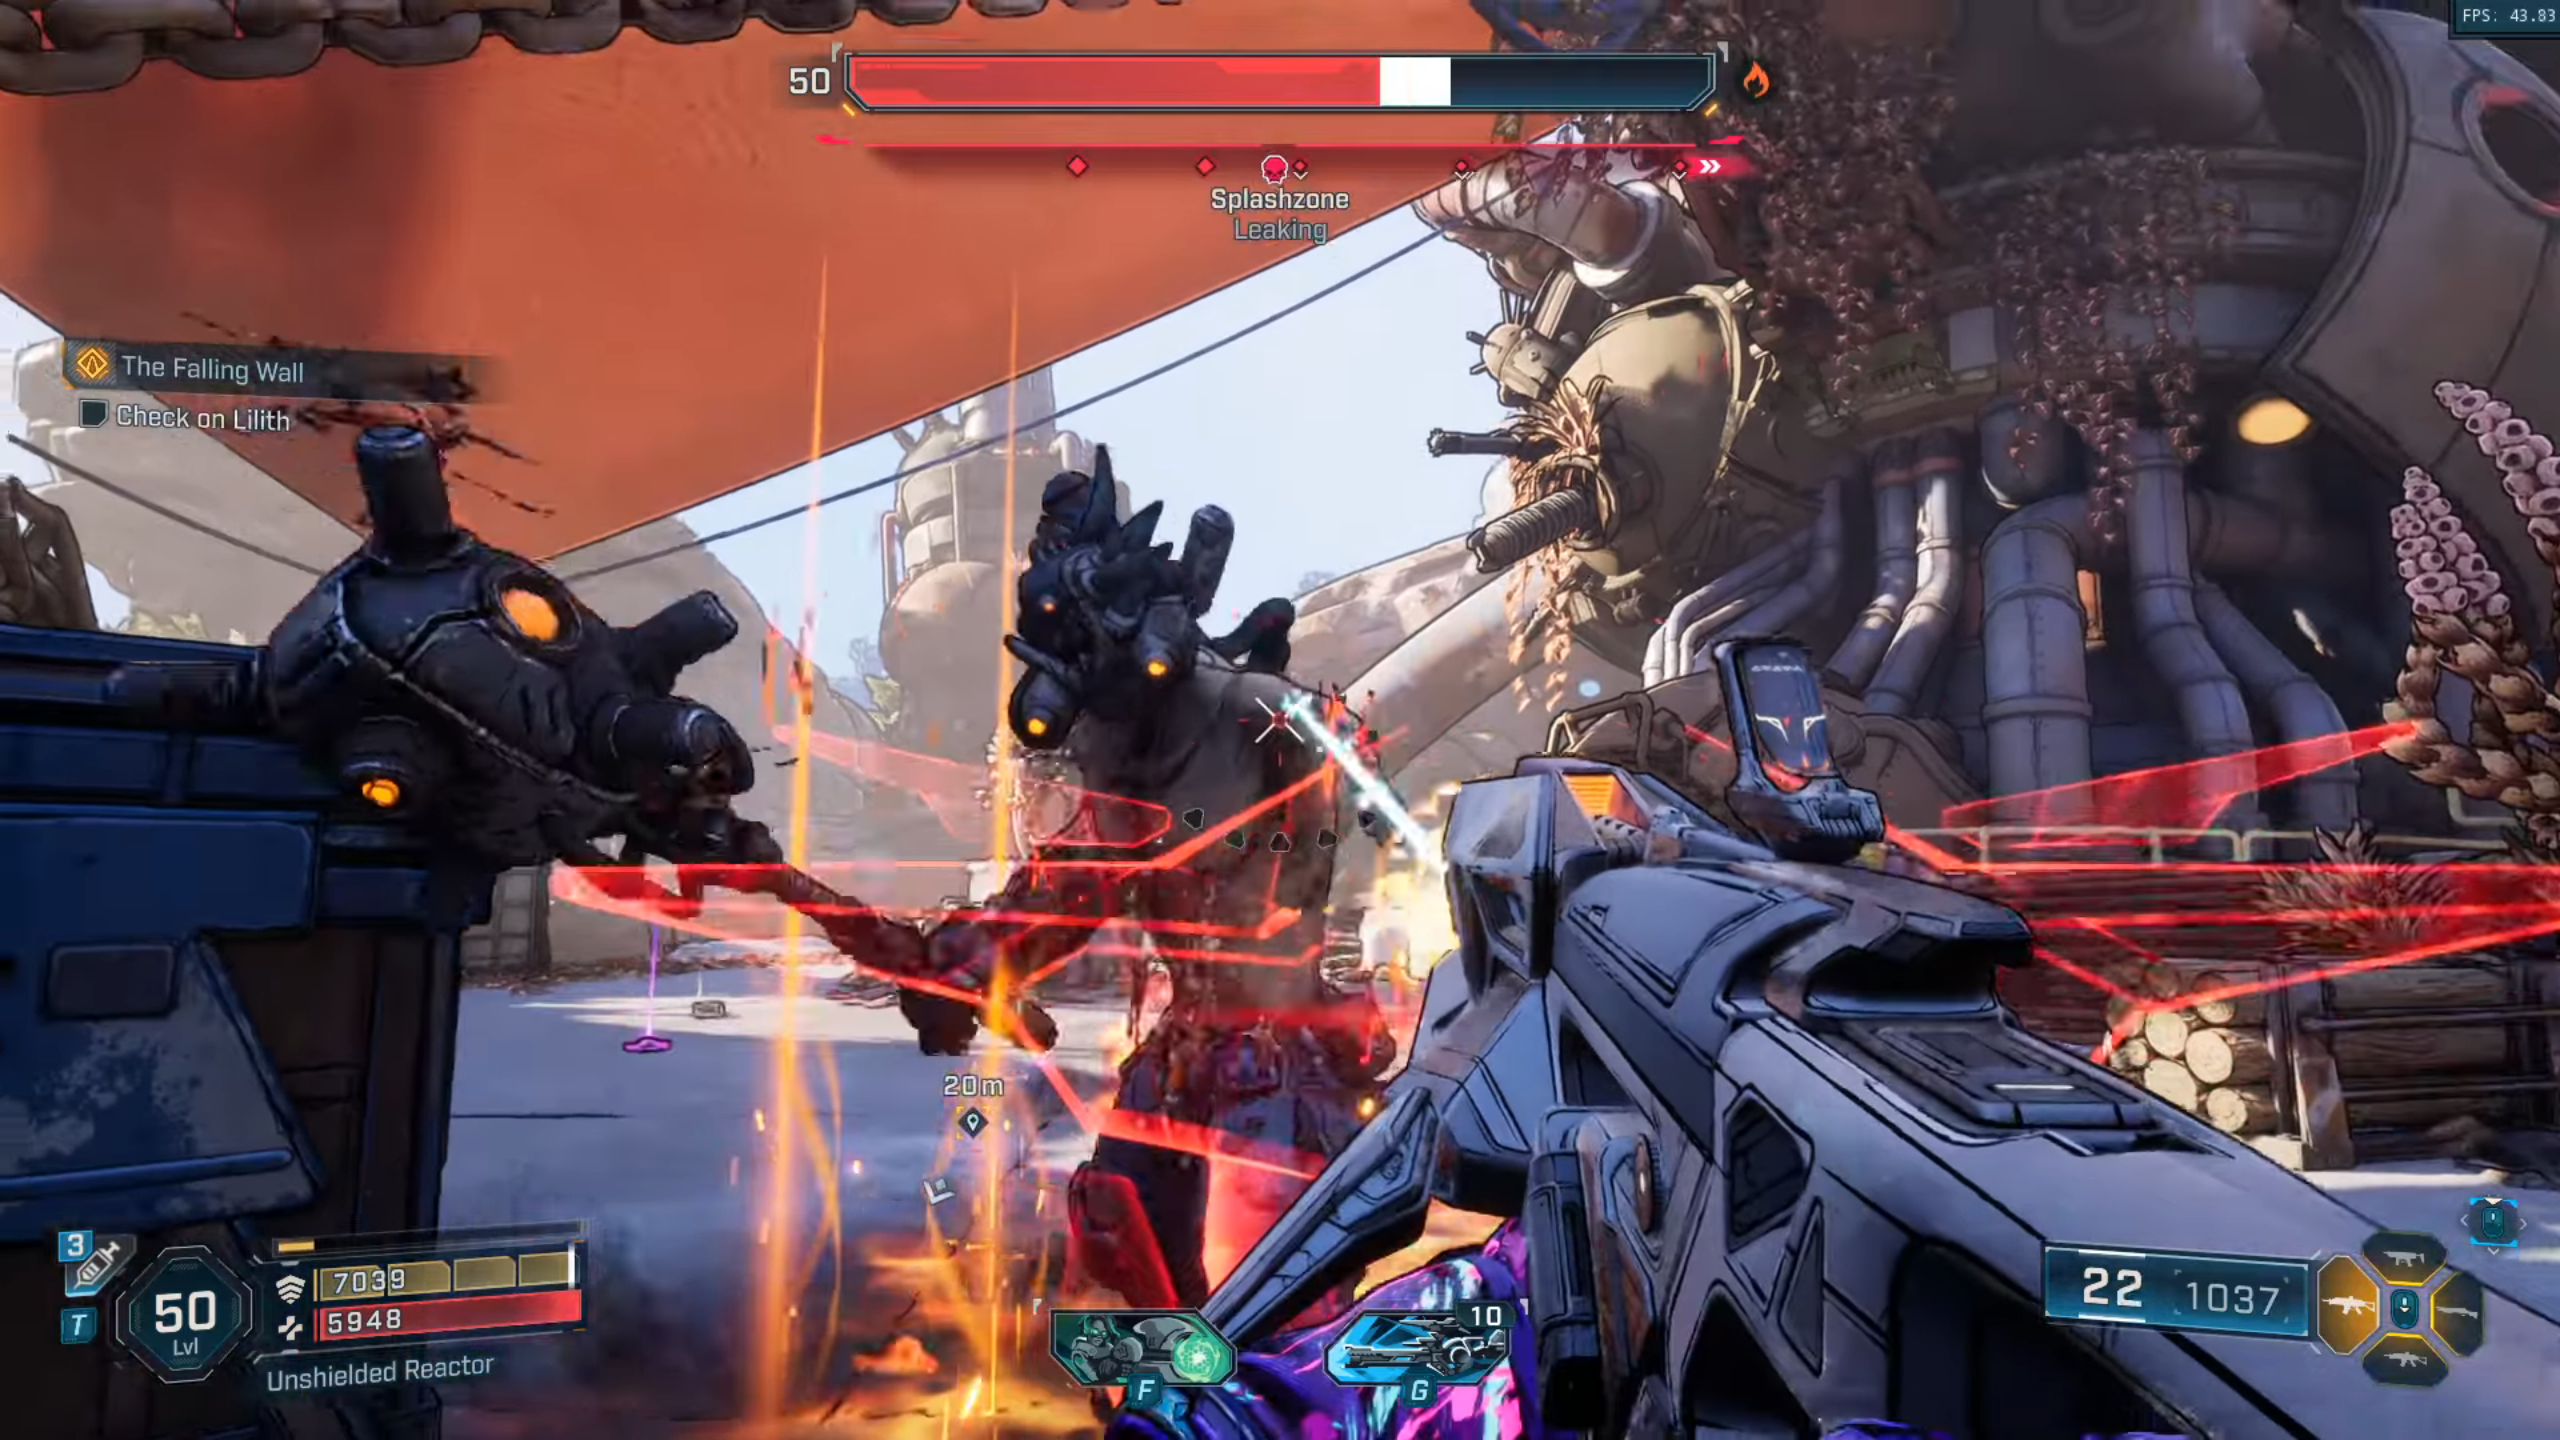
Among the formidable foes players face in Borderlands 4, Splashzone stands out with his colossal hammer and rapid mobility. This aggressive adversary uses explosive dashes to close gaps while delivering devastating area-of-effect attacks. Strategic positioning and environmental awareness prove crucial when combating this enemy.
This guide details optimal strategies for confronting Splashzone, including battlefield navigation and loot acquisition methods.
Splashzone Encounter Location Guide
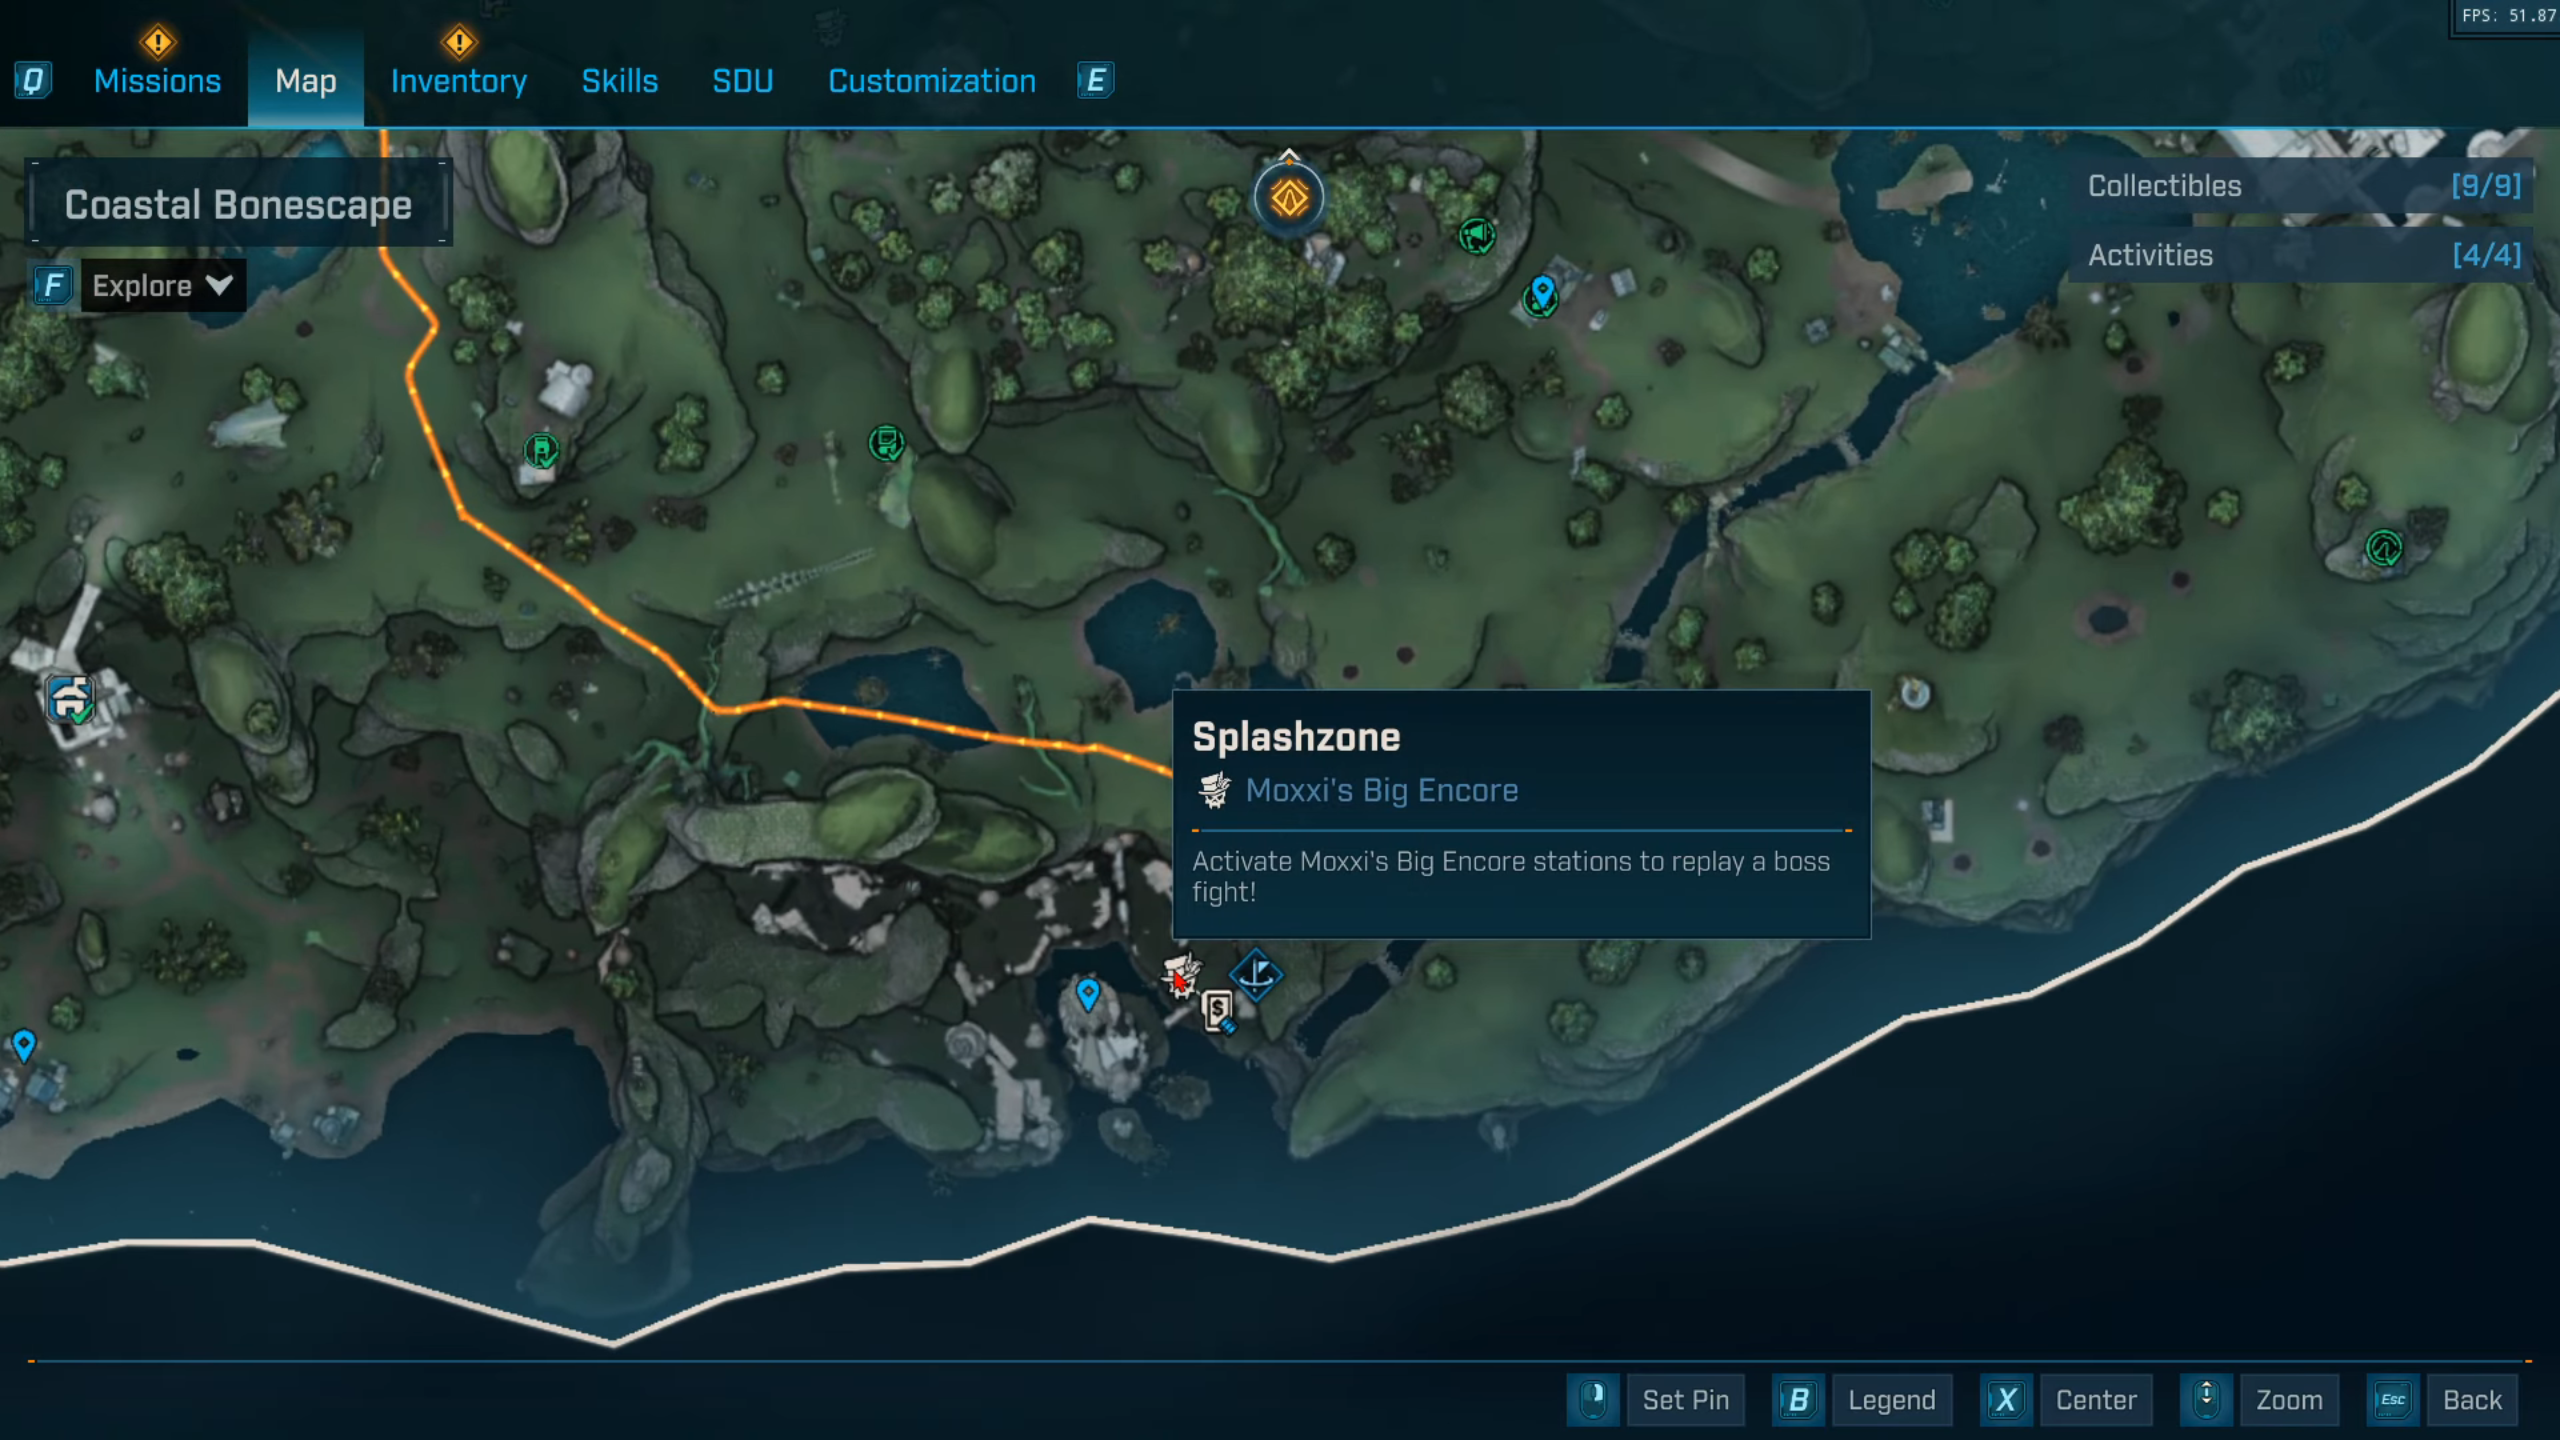
Initiate the Splashzone confrontation by traveling to Fadefields’ Coastal Bonescape region and locating Riptide Grotto. This encounter activates during the “Recruitment Drive” campaign mission. Thermal-based armaments prove particularly effective given the enemy’s organic composition, though cryogenic or radioactive alternatives remain viable.
Maintaining constant movement prevents successful hammer strikes from the boss’s lunging attacks. Explosive environmental hazards scattered throughout the arena can be triggered for substantial damage by luring Splashzone into their blast radius. Players seeking enhanced rewards can utilize post-campaign replay systems to farm upgraded gear.
Splashzone’s Legendary Loot Table
Successful completion of this combat encounter yields these high-tier equipment options:
| Weapon | Category | Special Effect | Description |
|---|---|---|---|
| Jelly | Grenade | Replicating | Generates duplicates after surface impacts |
| Fireworks | Armor Shield | Bundled | Eliminations trigger homing missiles dealing 3,732 damage |
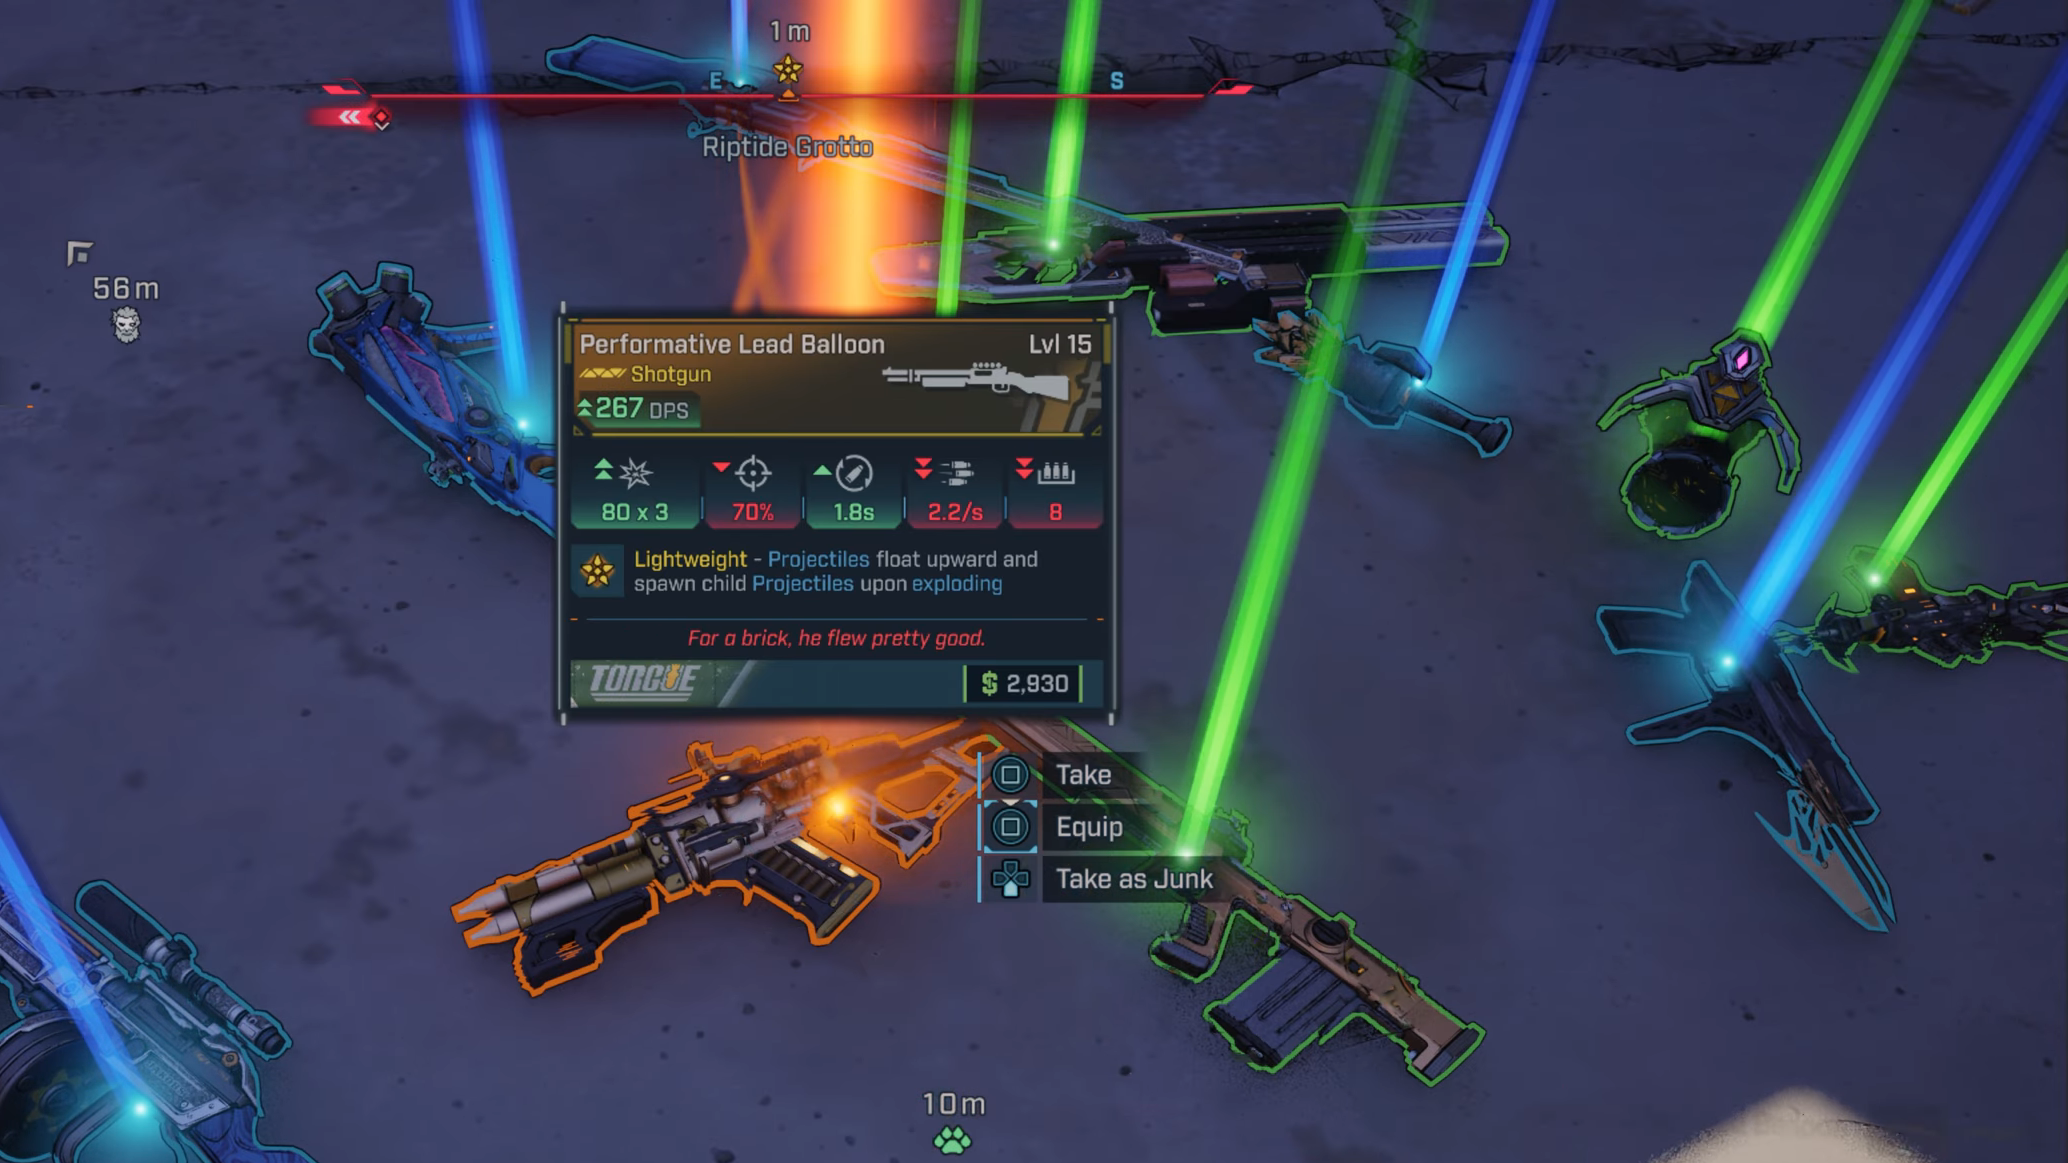
| Lead Balloon | Shotgun | Lightweight | Floating projectiles detonate into secondary fragments |